You have no items in your shopping cart.
How do I test my Bose SoundLink battery?

The battery life of the Bose SoundLink has always been one of its most attractive features. Today I want to share with you a fun little experiment that can help you understand the health of your SoundLink battery. With some simple methods, you can easily Test the battery usage.
For our experiment, we chose a quiet environment to ensure that there were no distracting sounds around to test the performance of the SoundLink battery. The environment has a great impact on the test results. If the test is conducted in a noisy party, the process will lose At the same time, pay attention to the test time to ensure that the test does not disturb the rest of the neighbors.
The next step is to fully charge the SoundLink speaker , otherwise it will affect the accuracy of the test results. We did the following preparations: Turn the volume to the maximum and play your favorite music. Keep the music playing and arrange for a dedicated person to record the playing time. When the speaker automatically shuts off, write down the total playing time.
When the speaker automatically shuts down, record the total playback time. This time will become the real reflection of the SoundLink battery, and we compare it with the official battery life to assess the battery health.
Generally speaking, the battery life of Bose SoundLink should be around 10 hours. If you find that the actual battery life of your speaker is significantly lower than the official data after it is fully charged, for example, only around 5 hours, then your battery may be aging or have problems.
This process is labor-intensive and time-consuming. Users who are interested in some small experiments can try it. The following are the test steps we summarized for your reference.

Test steps
To obtain accurate test results, the following steps need to be strictly followed:
Step 1
Choose a quiet environment. Make sure the test environment is quiet and away from any noise sources that may interfere with the normal playback of the speaker.
For example, choose a separate room and turn off the TV, computer, mobile phone and other devices.
A quiet environment can ensure that the test results are not disturbed by external noise, thereby obtaining more accurate test data.
Step 2
Fully charge the SoundLink speaker using the original charger. Make sure the battery is fully charged, which usually takes 2-3 hours.
A fully charged speaker ensures that the battery is fully charged during the test and will not affect the test results due to insufficient power.
Step 3
Turn the volume to maximum and play your favorite music. The maximum volume test consumes the most battery energy and more accurately reflects the actual battery life.
The maximum volume test simulates the power consumption of the speaker in intensive use scenarios and more accurately evaluates the actual battery life.
Step 4
Start timing from the start of the music playing until the speaker automatically shuts down, and record the total playback time.
Recording the playback time can accurately reflect the actual battery life of the speaker and provide users with a more accurate reference.
Strictly following the above steps can get more accurate test results and better understand the actual performance of the speaker.

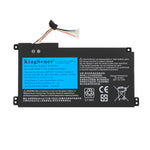
KingSener 088796 088789 088772 080841 Bluetooth Speaker Wireless Battery For BOSE Soundlink Mini 2 7.4V 2600mAh/19.24WH
5% off the purchase of 5 or more batteries
Specification:Battery Model:088796Capacity: 2600mAh/19.24WHVoltage: 7.4VBattery Type: Li-ionCell:2 Cells ,made in Korea, super quality and fully compatible ,100% test before... Buy Now
Test results analysis
After the test is complete, you can evaluate the health of the SoundLink speaker battery based on the recorded playback time. Here are some reference indicators:
New Batteries: New batteries typically provide 10 to 16 hours of continuous play time. This means the battery is in optimal condition and will provide long-term music enjoyment.
Normal Battery: A normal battery has a play time between 8 and 12 hours. This means the battery is still good, but may have started to age slightly.
Battery aging: If the battery life is less than 6 hours, it may be an indication that the battery has aged and needs to be replaced. This means that the battery's capacity has significantly decreased and can no longer provide enough power to support extended playback.
If you suspect there is a problem with your SoundLink battery, we recommend that you contact Bose customer service for consultation or repair.
In addition, you can also try to use some third-party software to test your SoundLink battery. These software can usually provide more detailed battery information, such as the remaining battery power, cycle count, etc.
It should be noted that the reliability of third-party software may vary, and it is recommended to choose reputable software for use.
Replacing the SoundLink battery
Many customers agree that replacing the SoundLink battery is not a difficult task. They can buy the battery themselves and replace it according to the instructions or video tutorials. The whole process is very simple and convenient. This DIY fun makes people feel satisfied and proud, and it also saves the trouble and cost of finding a professional repairman.
But it requires some steps and precautions. First, you need to prepare the appropriate tools and materials. You will need a Phillips screwdriver to disassemble the speaker, as well as a new battery.
Make sure the battery model you purchase is compatible with your SoundLink speaker. Different models of SoundLink speakers may use different battery types. Please check your speaker model and battery specifications carefully before purchasing.
Before you begin replacing the batteries, make sure the speaker is turned off and unplugged from the power source. Turn the speaker over and locate the battery compartment. Typically, the battery compartment is located on the bottom or side of the speaker.
Using a Phillips screwdriver, carefully remove the screws on the battery compartment cover. After removing the screws, gently remove the battery compartment cover.
Now you can see the battery. Gently remove the old battery from the battery compartment. Install the new battery into the battery compartment.
Make sure the positive and negative poles of the battery match the markings on the battery compartment.
After installing the new battery, replace the battery compartment cover and secure the screws with a screwdriver. Finally, turn on your SoundLink speaker to test whether the new battery is working properly.
After replacing the batteries, you can continue to enjoy the wonderful music brought by your beloved SoundLink speakers.
If this article still doesn't help your laptop battery, you can buy a new battery at BatteryMall.com.
If you want to learn more about batteries, please visit: BatteryMall.com/blogs/support