You have no items in your shopping cart.
HP Notebook Battery Replacement
In the pace of modern work and study, laptops have become an indispensable tool. Whether it is used for office work, entertainment, or creation, the performance of the battery directly affects the user experience of the device. However, over time, the performance of the battery may deteriorate, resulting in a shortened usage time or even failure to work properly. If you are a user of an HP laptop, then knowing how to replace the battery will help you extend the life of the device and maintain optimal performance.
Why do I need to replace the battery?
As batteries age, their ability to hold a charge decreases. You may notice several symptoms:
Laptop battery life is significantly reduced when running
The battery will not charge fully, or dies quickly after charging
Battery not recognized or displays incorrect battery status
When your HP laptop computer experiences these problems, it may mean it's time to replace the battery.
HP laptop Battery Replacement - Kingsener HT03XL | BatteryMall
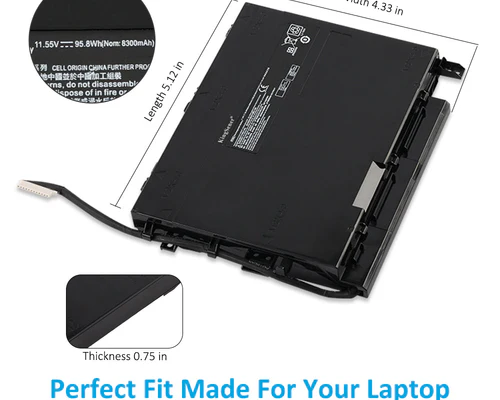
Specification:
Battery Model:HT03XL
Capacity: 3615mAh/41.7WH
Voltage:11.55V
Battery Type: Li-ion
Color:Black
Condition:Replacement Battery (100% Brand New,2 years warranty!)
Replace Part Number:
HT03XLHSTNN-LB8LHST... Buy Now
How do I replace my HP laptop battery?
Replacing the battery on an HP laptop is relatively simple, but there are still some key steps to take to ensure the replacement goes smoothly.
The detailed steps to replace the HP laptop battery are as follows:
Preparation:
1. Confirm the battery model:
First, make sure the battery you purchased is compatible with the laptop model. You can check the original battery model through the label on the bottom of the laptop or the system settings.
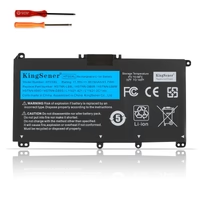
2. Prepare tools:
Small Phillips screwdriver
Plastic spudger (if needed)
New battery
A clean cloth or soft pad (to place the notebook on to avoid scratching it)
3. Disconnect the power supply:
Shut down the computer: Make sure the laptop is completely shut down to prevent any current from flowing through the battery circuit.
Disconnect all external devices: such as mouse, keyboard, USB flash drive, etc., and make sure the device is not connected to the computer.
Replacement steps:
Step 1: Disconnect the power adapter
Unplug the power adapter and any external devices. Make sure the laptop is completely powered off.
Step 2: Remove the bottom screws
Turn the laptop over and place it on a flat surface. Use a screwdriver to remove all screws on the bottom. Note that some laptops may have hidden screws that need to be checked.
Step 3: Open the bottom cover
After removing all screws, carefully open the bottom cover with a plastic opening tool. If the cover has a clip, pry it open gently to avoid damaging it.
Step 4: Disconnect the Battery
Once the bottom cover is removed, locate the battery. Typically, the battery is attached to the logic board, connected to the motherboard via a small socket.
Use your fingernail or a plastic opening tool to carefully disconnect the battery connector. Be careful not to use excessive force to avoid damaging the connector.
Step 5: Remove the Old Battery
Remove the screws that hold the battery in place (if any). Then gently remove the battery. Note that some batteries may be glued in and require careful handling.
Step 6: Install New Batteries
Align the new battery with the battery slot, making sure the battery is aligned with the connector. Gently place the battery into the battery compartment.
Connect the battery to its socket on the motherboard, making sure the socket is fully connected.
Step 7: Securing the Battery
If the battery has screw holes, use a screwdriver to secure the battery in place.
Make sure the battery is secure and not shaking.
Step 8: Reinstall the bottom cover
Align the bottom cover with the laptop and press gently until the clips are fully locked. If there are screw holes, use the screws to secure the cover.
Step 9: Install the Screws
Use a screwdriver to install the screws at the bottom one by one. Make sure each screw is tightened and do not miss any.
Step 10: Power on test
Reconnect the power adapter and turn on the laptop.
Make sure the new battery is recognized, the battery icon is displayed normally, and charging begins. You can view the battery health status and charging progress in Battery Settings.
Note:
When disassembling, try to avoid using excessive force to avoid damaging the laptop components or battery.
If you are unsure of the battery model, check your laptop manual or contact the battery manufacturer directly.
When a new battery is used for the first time, it can be fully charged and discharged once to help calibrate the battery.
By following these steps, you should be able to successfully replace the battery in your HP laptop and restore battery life.
HP battery replacement recommendations
Charging habits: Try to avoid fully draining the battery before charging. Keeping the battery charge between 20%-80% will help extend the battery life.
Regular calibration: Perform battery calibration every few months to ensure accurate display of battery capacity by fully charging the battery and then fully discharging it.
Avoid high temperature environment: High temperature will accelerate battery aging. Try to avoid exposing the laptop to high temperature environment for a long time.
HP's environmental protection philosophy and battery recycling
Conclusion
By replacing the battery at the right time, you can greatly extend the life of your HP laptop and improve your work and study efficiency. I hope this battery replacement guide can help you easily deal with battery problems and ensure that your device is always in the best condition. If you encounter any problems during the replacement process, please feel free to contact our customer service or visit batterymall for more support information.